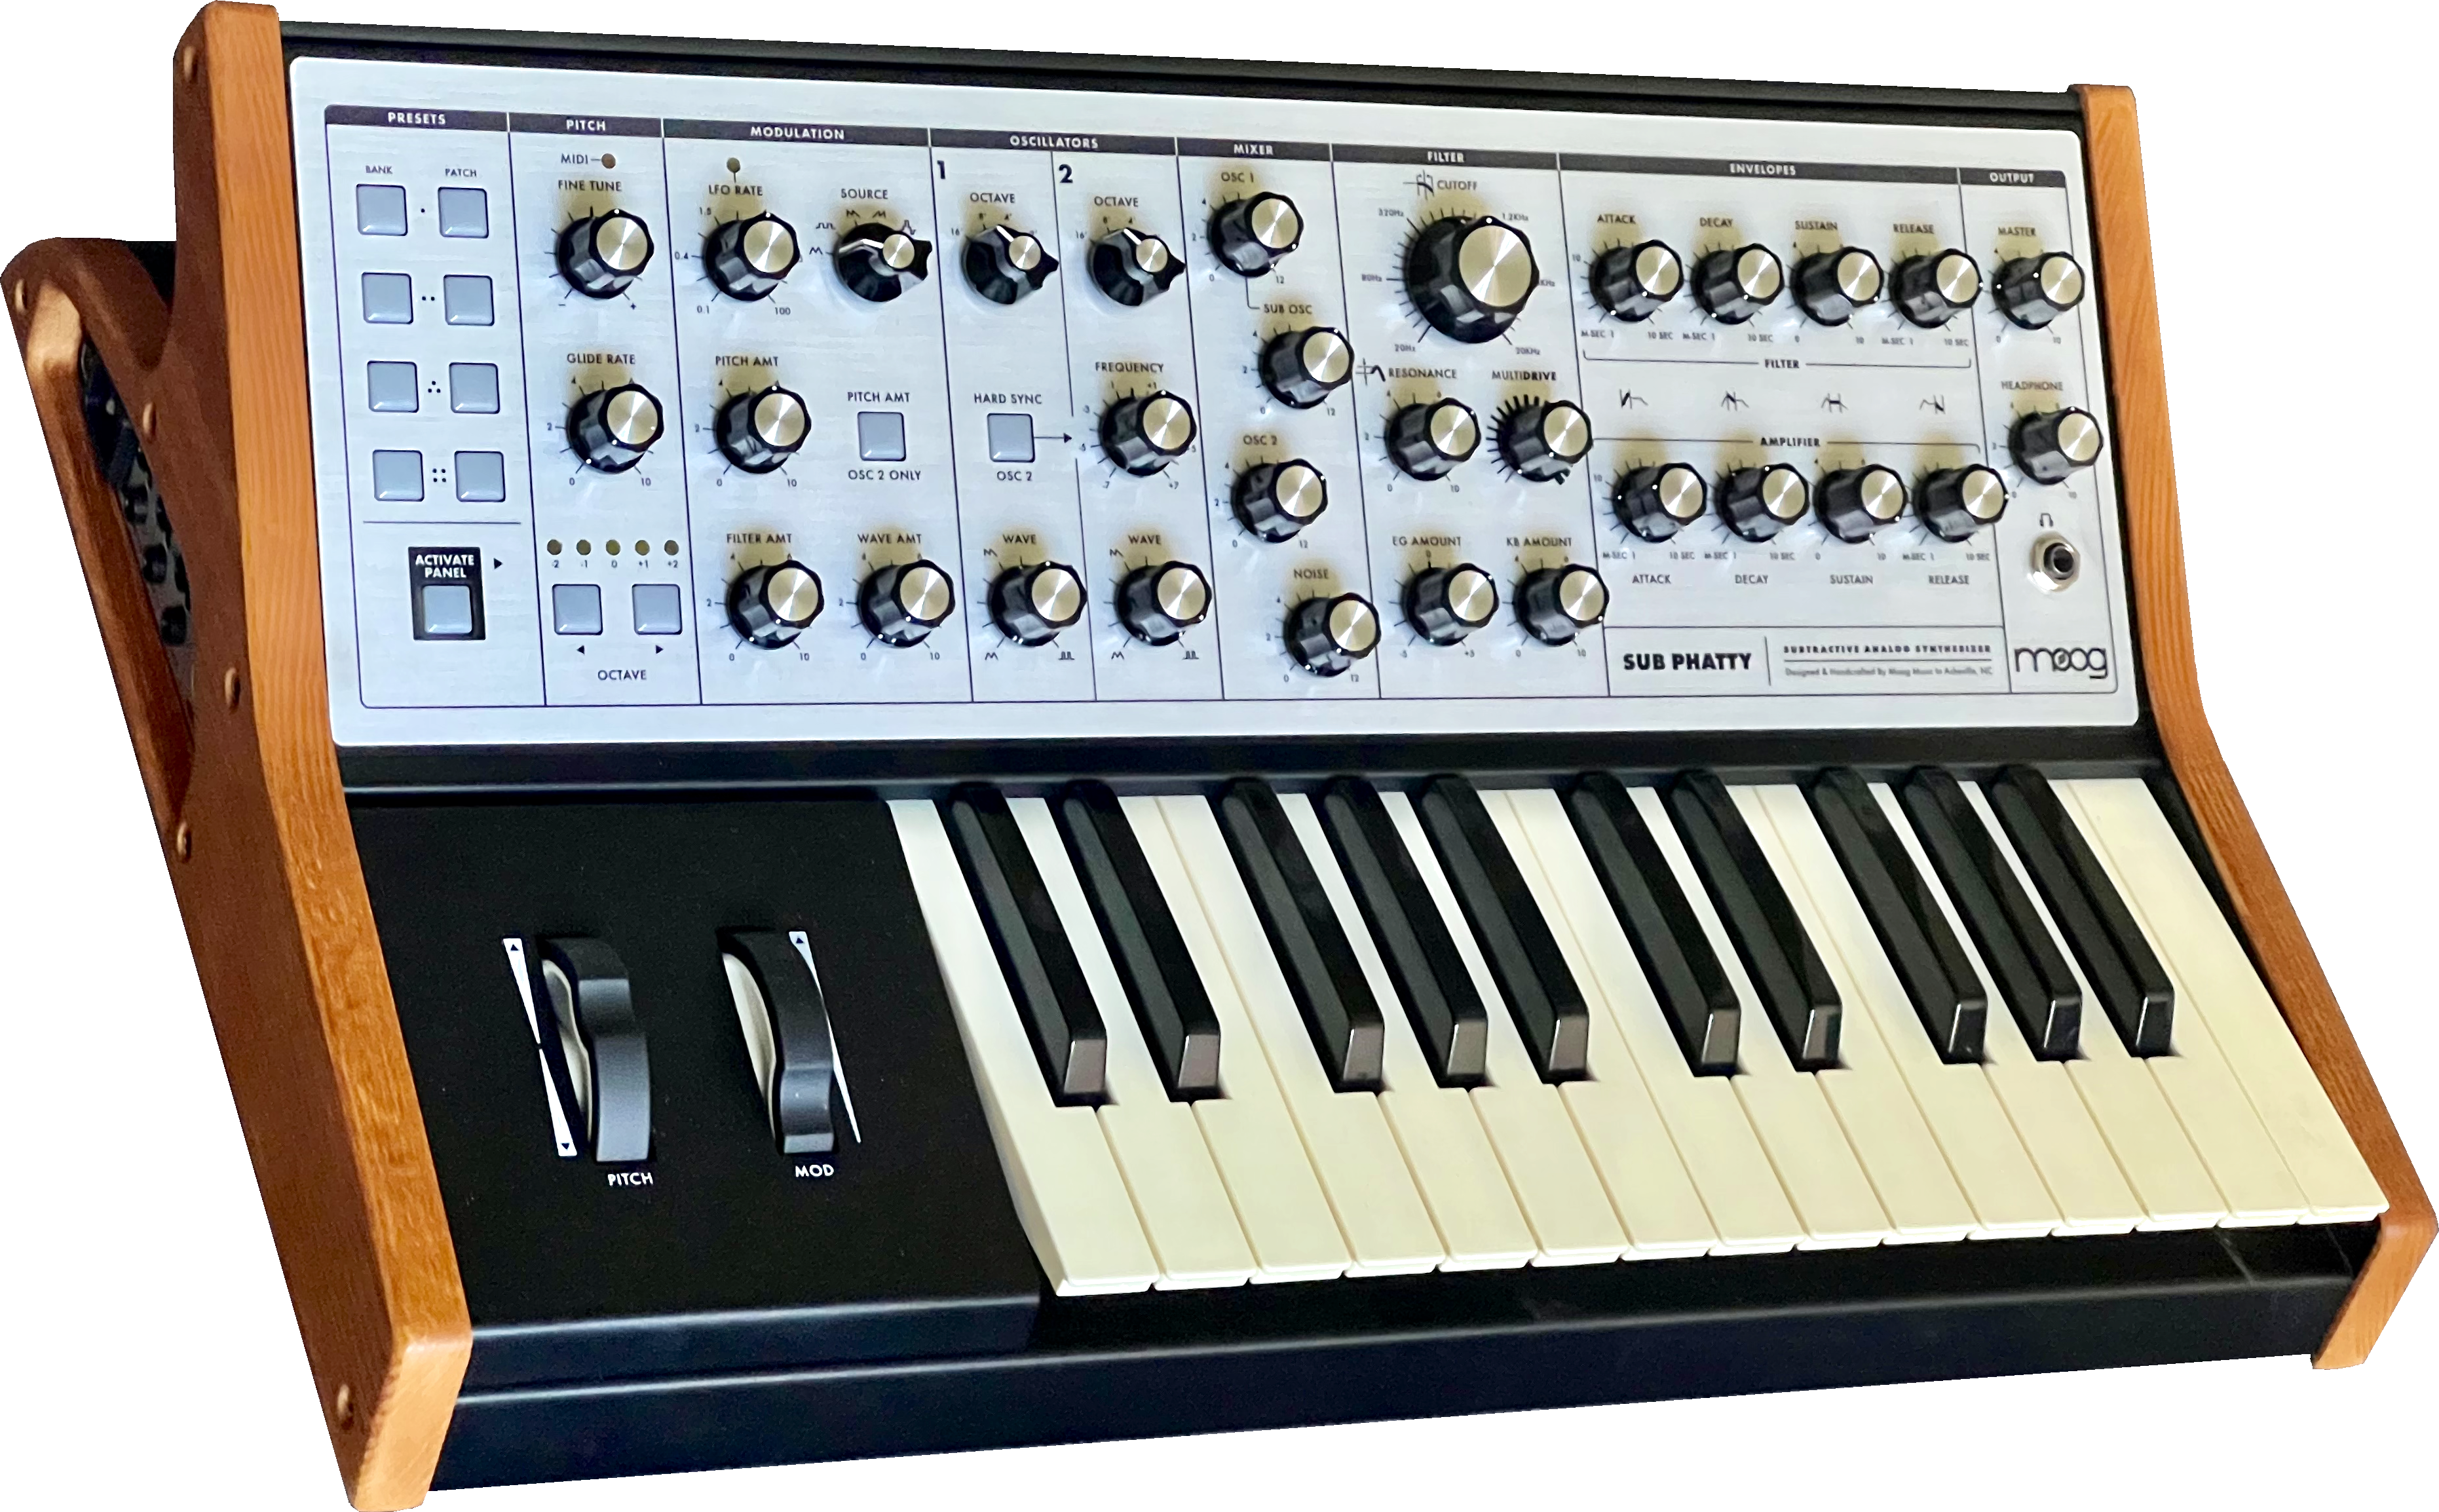
Moog Sub Phatty

It looks quite basic if judged by the front panel. But most 2 buttons and 10 knobs have a second parameter in the special shift mode. You enter it by pressing Bank 4 + Active Panel buttons. You may leave this mode by pressing Active Panel again.
The 10 additional knob parameters are (original knob name in brackets):
Filter Envelope Section
- Filter Envelope Delay (Filter Envelope Attack)
- Filter Envelope Hold Time (Filter Envelope Decay)
- Velocity to Filter Envelope Amount (Filter Envelope Sustain)
- Velocity to Filter Envelope Decay/Release (Filter Envelope Release)
Amplifier Envelope Section
- Amplifier Envelope Delay (Amplifier Envelope Attack)
- Amplifier Envelope Hold Time (Amplifier Envelope Decay)
- Velocity to Amplifier Envelope Amount (Amplifier Envelope Sustain)
- Velocity to Amplifier Envelope Decay/Release (Amplifier Envelope Release)
Oscillator and Mixer Section
- Oscillator 2 Beat Frequency (Oscillator 2 Frequency = detune)
- External Input Level (Mixer Noise Volume)
And the buttons
- LFO Gate Reset (Modulation Pitch Amt OSC 2 Only) to retrigger the waveshape on a note on
- Oscillator Gate Reset (Oscillator Hard Sync Osc 2) to retrigger the waveshape on a note on
And while you are in this mode, you can also do things like setting the note priority, the envelope trigger modes per envelope, set the number of filter poles, MIDI settings (Channel, sending sysex data, ...), initialize the current preset, and note calibration. The keybed's lower notes are used to select values or to start function in this mode. Please read the manual.
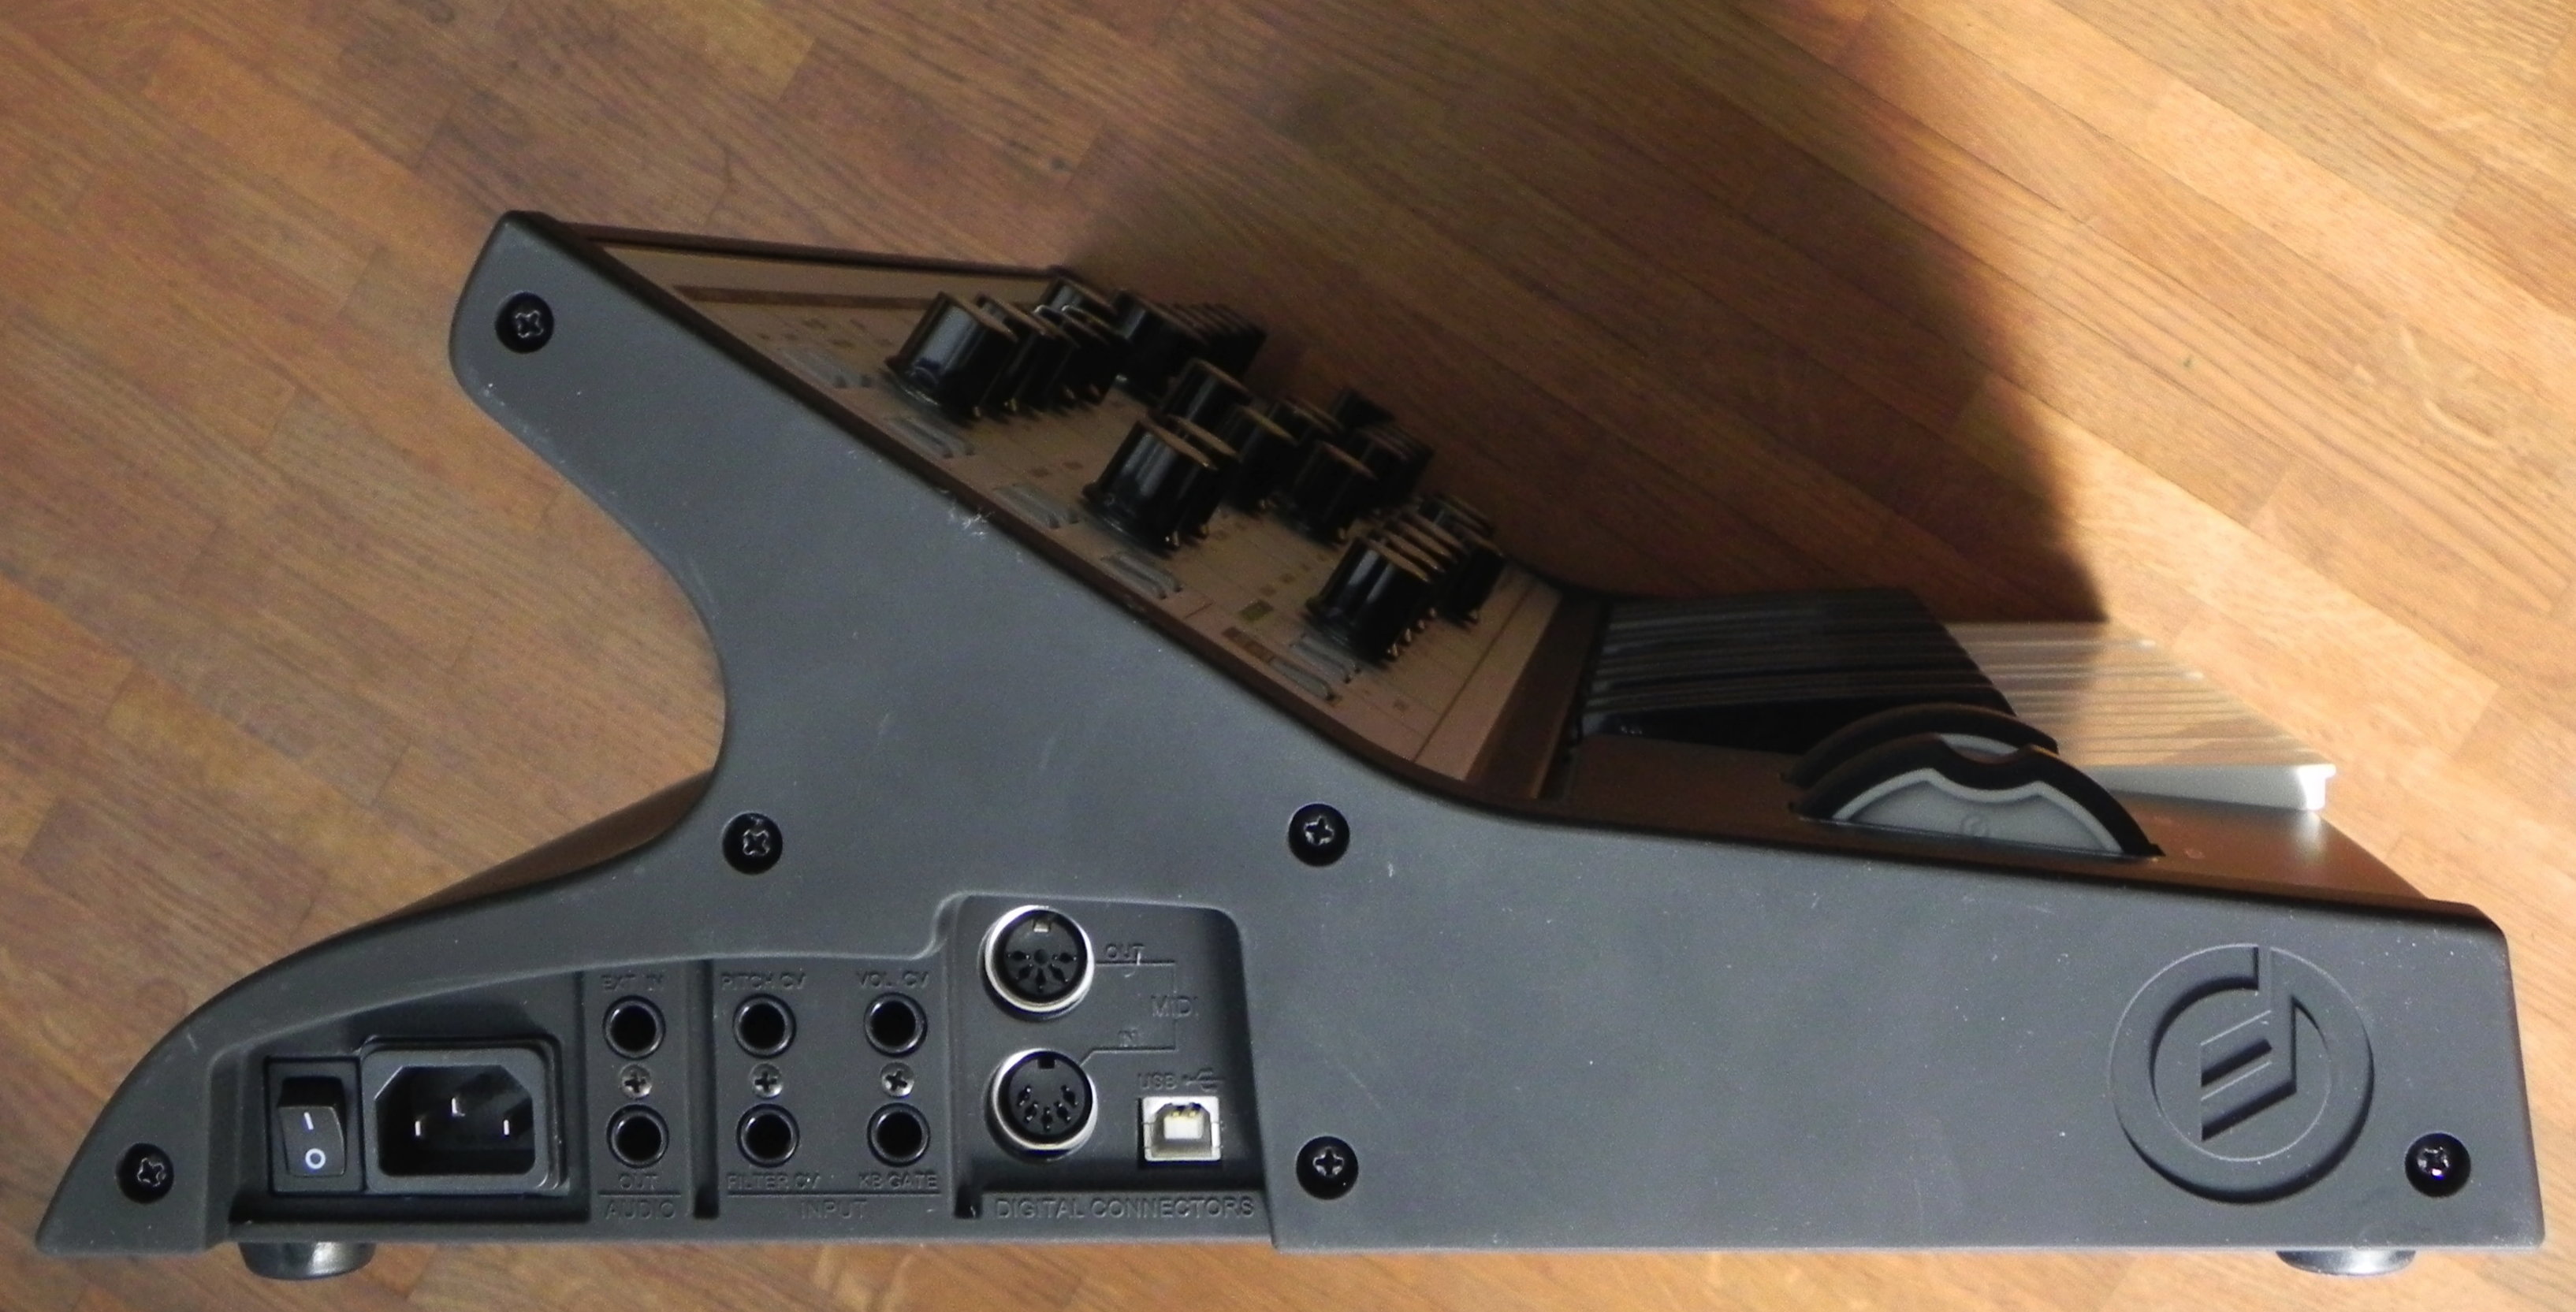
You can't read the black labels for all those connections available on the left hand side in normal studio light, as it they are black on black.
- Power (obvious)
- Audio Out (another obvious one)
- External Audio In
- Pitch CV
- Filter CV
- Volume CV
- KB Gate
- MIDI In
- MIDI Out
- USB MIDI
Pro
- Bold Moog Prodigy alike sound character (if used without too much distortion used)
- Compact design, but full size keys
- Many features for its price tag and size (but not all of them seen on the panel)
Cons
- Not intuitive or labeled way to reach the very useful second parameter mode
- Second parameter mode function Oberheim OB 8 alike not labeled (were they introduced after the design was fixed?)
- Unreadable socket labels under many light conditions
- Side panels and wheels get sticky over the time (I had to replace these parts. See below)
- White keys are getting beige way faster than all my other keybeds
- Many owners have trouble with the rotary switches not working anymore (I exchanged these after the trouble started here as well)
Conclusion
To me, the Sub Phatty is the modern equivalent in sound and size to the Moog Prodigy in the early eighties.And years later ...
Yes, the white keys are not white anymore.
After owning the Sub Phatty for 9 years, it developed very sticky side panels and wheels. So I bought the wooden Subsequent25 side panels to exchange these for the black plastic ones. I also bought a new left hand section with fresh wheels. But these will become sticky most likely again over the years. And my Sub Phatty suffered the well known problems with the rotary switches for VCO octaves and the LFO waveshapes. So I had to exchange these. The front panel PCB is in two parts, so I just had to remove only this one. Notice the different diameters of the pots axis. And the pointer caps of the rotary switches got little metal adapters on the rotary axis. Be sure to transfer them to the new ones before throwing the old rotary switches in the bin.